Quality Custom Embroidery: Professional Stitching Services for Modern E‑commerce Brands
Custom embroidery sits in an interesting place in today’s on-demand and dropshipping world. You are competing on speed, convenience, and price, but the brands that last almost always compete on perceived quality as well. High-caliber stitching on a polo, hoodie, or cap communicates more than a logo; it signals that you take your brand, your team, and your customers seriously.
Industry sources like HoopTalent and MaggieFrame estimate that commercial and custom embroidery already generates several billion dollars globally and is on track to roughly double over the next decade. At the same time, on-demand platforms such as Printful, Printify, and Gelato have made it possible to sell embroidered products without owning a single machine or holding any inventory. As someone who mentors founders in this space, I see one common pattern: brands that understand what “quality embroidery” really means grow faster and refund less.
This article breaks down how professional embroidery services work, what drives quality and cost, and how to choose partners and design practices that match the margins and expectations of a serious online brand.
Why Quality Embroidery Still Matters
For many buyers, embroidery is the first tactile interaction with your brand. A clean, dense logo on a polo or cap feels premium in a way that basic give-aways never achieve. No Dinx, Accent Embroidery, and Royal Stitch & Print all frame custom embroidery as a way to turn uniforms and merch into long-term brand assets rather than disposable swag.
On staff apparel, consistent, high-quality embroidery does three things at once. It makes your team look like a team, it reassures customers that they are dealing with professionals, and it quietly advertises your business in every real-world interaction. No Dinx emphasizes how embroidered uniforms create unity and pride among employees, while Royal Stitch & Print highlights the polished look corporate clients achieve with embroidered polos, jackets, and caps.
On customer merch, embroidery works as mobile brand signage. When a fan wears an embroidered hoodie, hat, or tote, they are doing indirect marketing for you. Guides from No Dinx and HoopTalent both point out that well-designed, desirable pieces can outperform traditional ads because they are worn repeatedly, not scrolled past once.
In other words, quality embroidery is not just decoration; it is a long-lasting, physical touchpoint that improves perceived brand value every time it is worn or washed.
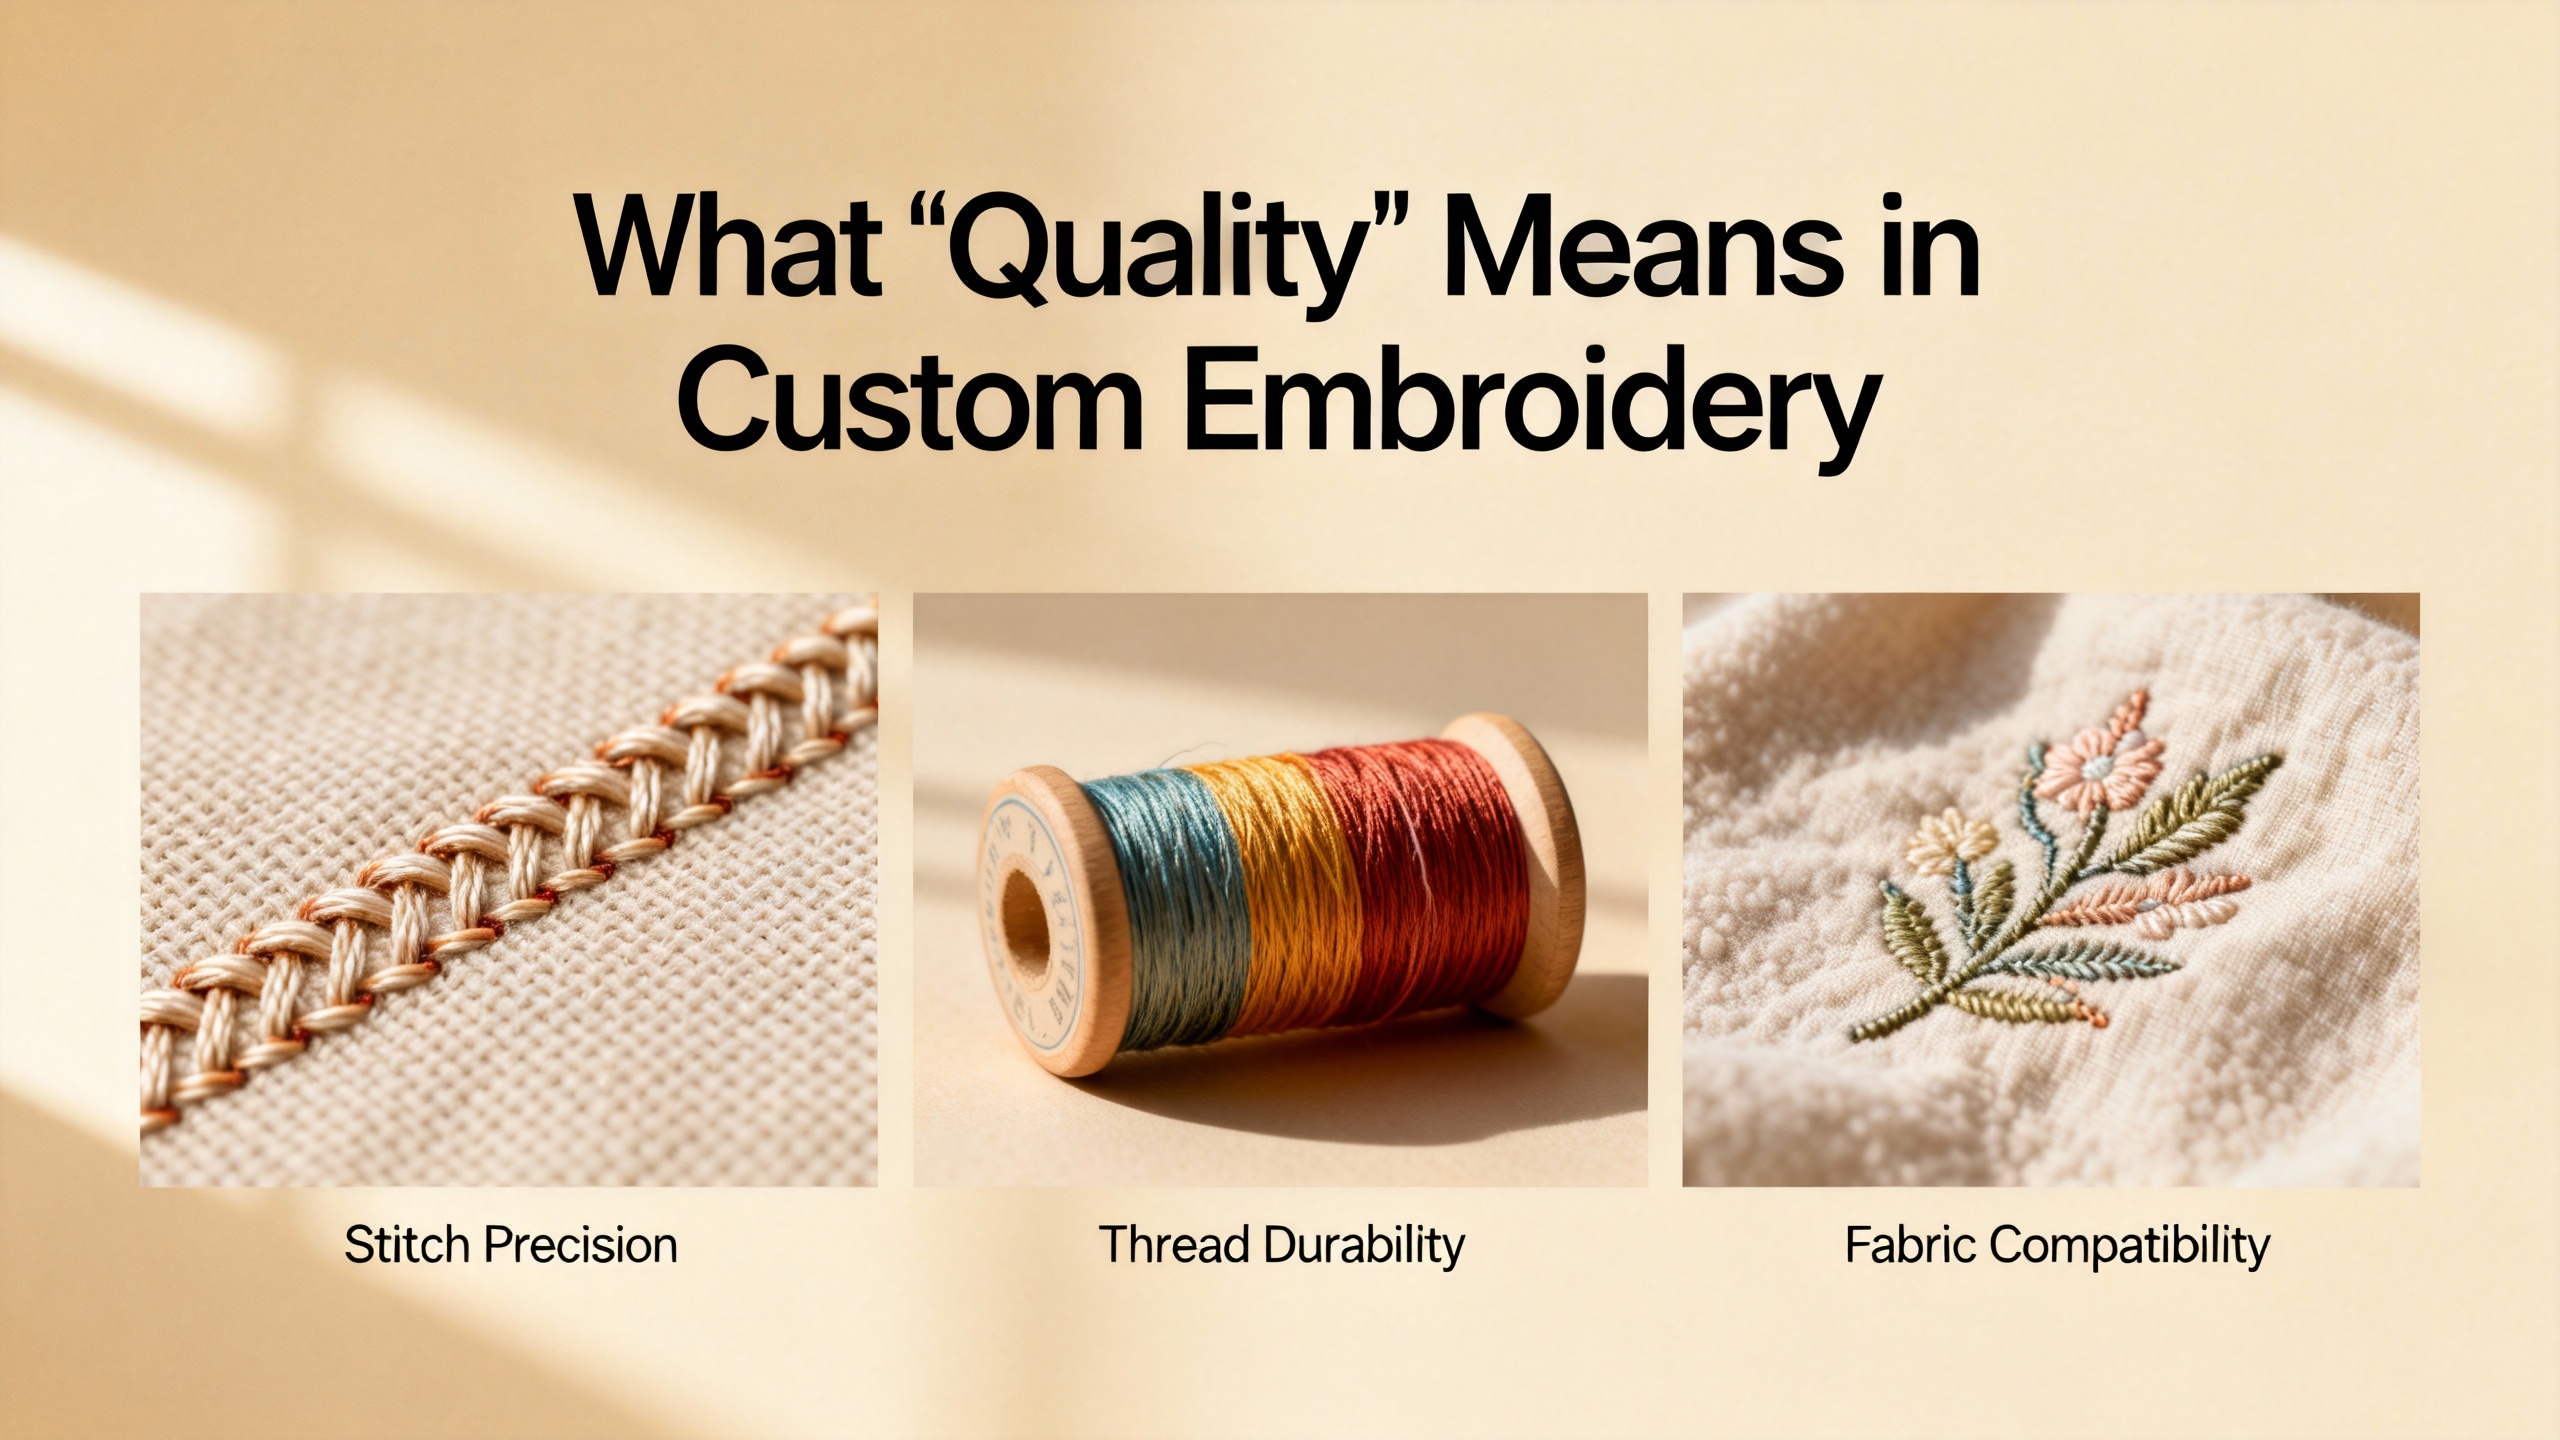
What “Quality” Means in Custom Embroidery
Core definition and methods
Embroidery is the process of stitching a design directly into fabric using thread. Modern commercial embroidery is done on computerized multi-needle machines that read a digital stitch file, hold the fabric in a hoop, and move it under a needle that goes up and down in a fixed spot. Bigt Printing and Northwest Custom Apparel both describe how these machines can run many garments at once while maintaining consistent logo placement and stitch quality.
Common methods you will encounter include direct embroidery, patch embroidery, and 3D puff embroidery. Direct embroidery means stitching directly into the garment. Patch embroidery involves stitching a design onto a separate piece of fabric and then attaching that patch to items like caps, jackets, or bags. Elite Shirt Co. notes that 3D puff uses foam under the stitches to create a raised, textured logo, especially popular on structured caps where a bold, dimensional look is desired.
State Graphics also highlights appliqué, where cut pieces of fabric are sewn down and outlined with embroidery to build large, bold letters or shapes, which is common on athletic hoodies and jackets. Hybrid methods like direct-to-garment printing with embroidered accents can combine full-color printed images with stitched outlines or logos.
Visible and invisible quality drivers
From the outside, “quality” looks like clean lines, smooth curves, and crisp text that stays sharp after many washes. Under the hood, several technical factors are responsible for that result.
Digitizing quality is the first gate. Digitizing converts artwork into a stitch map that the machine can follow. OddInfotech and Gelato emphasize that this file should specify stitch types, directions, densities, underlay, and travel paths. Poor digitizing produces jagged curves, uneven lines, excessive jump stitches, and lettering that collapses into blobs. High-quality digitizers test on multiple fabric types and adjust settings for thick, thin, or stretchy materials so the same logo looks correct on a polo, hoodie, and cap.
Stitch density and underlay come next. Stitch density is essentially how tightly packed the rows of stitches are. If density is too high, the fabric can pucker and the design feels stiff. If it is too low, garment color shows through and the logo looks weak. Underlay stitches run beneath the visible design to stabilize the fabric. OddInfotech and The Embroider both stress that good underlay holds the material in place without adding unnecessary bulk, which is crucial on knits and performance fabrics.
Thread and fabric quality are non-negotiable. StitchDigitizer points to durable, colorfast threads and well-chosen needles as the foundation of clean, break-free stitching. The Embroider recommends polyester thread for long-lasting colorfastness and notes that sturdy fabrics like denim, canvas, or medium-weight cotton blends provide a stable base for embroidery. C&A Embroidery reinforces that cotton and cotton blends make excellent t-shirts for embroidery, while polyester performance fabrics can work very well when stabilized correctly.
Backing and hooping determine whether designs stay flat or warp. Stabilizers are placed behind the fabric to support the stitches. StitchDigitizer and The Embroider both underline the importance of pairing stabilizer weight and type with the garment. Proper hooping means the fabric is held firmly without being stretched, which helps prevent puckering and distortion once the hoop is removed.
Finally, finishing and quality control tie everything together. StitchDigitizer and The Embroider describe trimming stray threads, removing excess backing, dealing with hoop marks, and checking for issues like gaps, misalignment, or color bleeding. Strong providers, such as Extreme Screen Prints and StitchMine, build these checks into their process so defects are caught before orders ship.
How Professional Embroidery Services Work
Although every shop has its own flavor, industry guides from Bigt Printing, Northwest Custom Apparel, Royal Stitch & Print, No Dinx, Pro-Celebrity, and MaggieFrame describe a common workflow.
The process begins with artwork selection and preparation. You either supply a logo or collaborate with the provider to refine one. At this stage, designs are cleaned up for embroidery by simplifying shapes, removing gradients, and eliminating tiny details that stitches cannot reproduce. CNA Embroidery, RushOrderTees, and NW Custom Apparel all encourage simplifying artwork into bold shapes and clear color zones, because thread is not capable of smooth photo-style gradients.
Next comes digitization. Specialized software converts the artwork into a stitch file, such as DST, PES, or EXP, that embroidery machines can read. Bigt Printing notes that this is usually a one-time process per design, and Pro-Celebrity explains that if you already have a DST file, many vendors will waive setup fees. Extreme Screen Prints and HoopTalent report typical digitizing fees in the range of about $15.00 to $50.00 per new design, though some providers, like Pro-Celebrity, use a stitch-based setup model, for example $100.00 up to a certain stitch count and additional charges beyond that.
After digitizing, the provider sets up the machines. Operators load the stitch file, thread the correct colors, choose the stabilizer, and hoop garments. Northwest Custom Apparel describes how multi-needle machines hold the fabric in place while the needle moves up and down, with the machine moving the hooped garment to build the design. Shops like Royal Stitch & Print and No Dinx emphasize human oversight at this stage, adjusting tension, backing, and placement.
Test stitch-outs are the next critical gate. OddInfotech recommends running test pieces on the same fabric you plan to use in production to confirm density, underlay, and letter clarity. Many providers, including Pro-Celebrity and several traditional shops profiled by MaggieFrame, provide a sample sew-out or photo proof for your approval before proceeding with the full order.
Production runs after approvals. Machines stitch designs at high speed, often up to about 1,500 stitches per minute on commercial multi-head equipment, according to Extreme Screen Prints. Operators monitor thread breaks, bobbin changes, and any issues flagged by the machines. For contract or industrial providers such as K-5 Solutions and Qualität s.r.o., this stage can mean thousands of pieces per day, supported by structured workflows and experienced staff.
Finally, finishing, quality control, and packing ensure you receive ready-to-sell or ready-to-wear items. Royal Stitch & Print describes inspecting each piece for loose threads, misaligned logos, or placement errors, while State Graphics and StitchMine highlight structured checks and satisfaction guarantees as hallmarks of reliable vendors.
On-demand embroidery platforms follow similar steps but with a fully online front end. MaggieFrame and Gelato explain that in a typical POD workflow, your customer’s order is routed to the nearest fulfillment center, the garment is picked, the stitch file is loaded, embroidery is run and checked, and the finished item ships within about two to five business days without you ever handling inventory.
Pricing, Stitch Counts, and Profitability
What drives embroidery cost
Several consistent cost drivers appear across Bigt Printing, HoopTalent, Extreme Screen Prints, MaggieFrame, and Pro-Celebrity.
The first is setup and digitizing. Creating the initial stitch file is a fixed cost. Some providers charge a flat fee per design; others use tiered pricing based on stitch count. Extreme Screen Prints cites common ranges of around $15.00 to $50.00 for digitizing, while Pro-Celebrity outlines a model such as $100.00 for designs up to a certain stitch count with additional charges per extra thousand stitches. Many POD providers and traditional shops occasionally waive or discount these fees during promotions.
Stitch count is the next major factor. More stitches translate to more machine time and more thread. Extreme Screen Prints describes typical corporate logos in the 6,000 to 8,000 stitch range, and notes that at higher stitch counts, production per hour drops because each garment takes longer to sew. Hooptalent and MaggieFrame both mention per-thousand-stitch pricing, often between about $0.50 and $3.00 per 1,000 stitches depending on complexity and provider type.
The number of thread colors also affects cost. Each color requires its own thread path and sometimes a machine stop. Bigt Printing and HoopTalent recommend limiting designs to three colors when possible for budget control. POD embroidery, as MaggieFrame notes, commonly restricts designs to around six colors from a palette of roughly fifteen to keep runs efficient.
Garment type matters as well. Standard shirts and polos are relatively easy to hoop and embroider, so they are usually at the low end of labor costs. Bulky or awkward items such as thick jackets, heavy bags, or highly structured hats require more handling and setup time. Bigt Printing and Gelato both note that embroidery on heavier or more complex items often commands higher pricing.
Order volume works in your favor. Because setup is a fixed cost, the more pieces you run, the lower your per-unit cost. Bigt Printing explicitly calls out that per-unit pricing drops significantly as quantity increases. Extreme Screen Prints describes common volume discounts such as modest breaks in the 25 to 99 piece range and larger discounts for hundreds of pieces. Hooptalent also notes that many local shops work on tiered pricing and will negotiate on larger orders.
Typical price ranges from industry examples
Exact numbers will vary, but it is useful to anchor your expectations with ranges reported by several sources.
Bigt Printing reports that a custom embroidered baseball cap often falls in the neighborhood of $5.00 to $10.00 per item, while shirts with embroidered logos commonly run from about $20.00 to $30.00, with simpler designs sometimes coming in under roughly $20.00 depending on vendor and complexity.
MaggieFrame’s overview of online providers shows budget polos with basic embroidery starting around the low teens per piece and premium embroidered polos reaching toward $35.00 to $40.00, with hats often ranging roughly from $9.00 to $25.00 depending on product quality and brand tier. HoopTalent notes that embroidered t-shirts might land between about $10.00 and $20.00, polos between approximately $15.00 and $30.00, and hoodies between roughly $25.00 and $50.00 when garment and embroidery are combined.
Pro-Celebrity highlights a stitch-based model for logos, for example $7.00 per logo up to a certain stitch count with a per-thousand-stitch upcharge beyond that, plus an initial digitizing fee unless you provide a ready DST file. Extreme Screen Prints references per-thousand-stitch embroidery fees typically in the neighborhood of $0.50 to $2.00 per 1,000 stitches, with additional color-change fees for designs that involve many thread colors.
The takeaway is simple. As an e-commerce entrepreneur, you control many of the variables that drive your cost: stitch count, color count, garment choice, and order volume.
Margin targets for on-demand and hybrid models
MaggieFrame’s guide to on-demand embroidery notes that profitable POD embroidery sellers often target margins in the range of about 15 to 50 percent, with a common goal of roughly $10.00 to $20.00 profit per embroidered shirt and more than about $22.00 per piece for complex, multi-location designs. Those numbers assume you have priced correctly for your niche and are not quietly absorbing rising stitch counts or rush fees.
Because POD and dropship models have higher per-unit costs than owning machines, they rely on that margin discipline. Oversimplifying your prices to “whatever the market will bear” can quickly erode profitability once you account for digitizing, sample orders, and platform fees. The consistent recommendation across MaggieFrame, HoopTalent, and Extreme Screen Prints is to avoid underpricing your embroidery; it is far better to position it as a premium, long-lasting option and price accordingly.
Choosing the Right Embroidery Partner
Local full-service shops and regional specialists
If you plan to move serious volume over time, a strong local or regional embroidery partner can be a powerful asset.
Accent Embroidery’s guidance on picking an embroidery partner in Amarillo emphasizes alignment with your use case, whether that is corporate uniforms, sports team apparel, monogrammed gifts, or promo items. They position themselves as a full-service shop offering logo embroidery, monogramming, patches, and work on hats, polos, uniforms, towels, and bags so that quality stays consistent across every product type you order.
Local expertise and track record matter. Accent Embroidery points to more than a decade of experience in their city, while Royal Stitch & Print in New Jersey stresses family ownership, investment in high-end machines, and attention to detail. Both highlight strong repeat business and positive reviews as signals of reliability. HoopTalent adds that operational metrics such as on-time performance near the mid-90 percent range and order accuracy near the high-90 percent range are common benchmarks for professional shops.
Customer service is another differentiator. No Dinx, for example, assigns an account manager who guides clients from initial quote through design refinement, garment selection, thread color choices, production, and shipping. Royal Stitch & Print echoes this with a detailed process that includes color matching, fabric compatibility advice, strict quality checks, and flexible order sizes with no minimums.
Multiple guides, including those from TeemiPrint, Polished Imagewear, and State Graphics, recommend reviewing portfolios, speaking with past clients where possible, and reading reviews that mention not just final appearance but also responsiveness, clear communication, and on-time delivery.
Price is a signal, not the whole story. StitchMine and Extreme Screen Prints both warn that the cheapest quotes often come from vendors who cut stitch counts, use low-grade backing, or run minimal quality control. In practice, brands that choose solely on price wind up paying more later in rework, replacements, and damaged reputation.
Digitizing specialists and file quality
You can outsource digitizing separately or rely on your embroidery vendor to do it in-house, but it cannot be an afterthought.
OddInfotech emphasizes that high-quality digitizing keeps curves smooth, maintains even density, and minimizes unnecessary trims and jump stitches. It also adapts designs for different fabrics and ensures that small lettering remains legible rather than closing up or breaking apart.
A Quora contributor, a long-standing professional digitizer, describes digitizing as “painting with stitches” and stresses that it is a craft with its own rules. Underlay, stitch types, pull compensation, and density all interact differently on various fabrics. The same expert recommends reviewing test stitch-outs carefully, especially at the smallest sizes you plan to use, and being wary of services that promise instant turnaround at rock-bottom prices without showing real samples.
Reputable digitizing services provide files in standard formats such as DST, PES, or EXP and will revise designs based on your feedback. They often offer previews or sample sew-outs, and they adjust settings when migrating a logo from, say, a dense canvas bag to a light performance polo so that the brand mark remains consistent.
On-demand POD embroidery providers
On-demand embroidery services bring a different value proposition. MaggieFrame’s and Gelato’s guides explain how platforms like Printful, Printify, and Gelato allow creators to sell embroidered hats, hoodies, polos, and totes without buying machines or holding inventory. Orders flow directly from your online store or marketplace to the fulfillment center, and items are typically produced and shipped within about two to five business days.
These platforms differ in focus. MaggieFrame notes that Printful positions itself around premium products, in-house quality control, and options such as advanced color embroidery on some items. Printify emphasizes the breadth of its catalog, with more than a thousand items and AI design tools, but quality can vary by print partner. Gelato focuses on localized, eco-minded production with carbon-neutral shipping options and branded packaging.
All major POD embroidery providers charge a one-time digitization fee for new designs, often around $6.50 according to MaggieFrame’s research, though promotions sometimes waive this charge. They also typically price embroidery several dollars higher per item than comparable printed products; MaggieFrame indicates that embroidery may add about $6.00 to $8.00 per item relative to basic printing.
For early-stage brands and micro-niches, the strength of POD embroidery lies in its flexibility. You can test designs, target narrow audiences—such as specific hobbies, pets, or local pride themes—and scale successful products without committing to large inventory runs. Traditional, local embroidery remains stronger for very large uniform orders where bulk discounts and closer quality oversight matter most.
Design, Fabric, and Placement Decisions That Make or Break Quality
Simplifying artwork for stitches, not pixels
Embroidery has physical limits that screens do not. Threads cannot create ultra-fine gradients or microscopic detail. NW Custom Apparel, RushOrderTees, CNA Embroidery, and MaggieFrame all make the same point in different ways: simple, bold designs embroider best.
The first step is to simplify. Remove tiny lines, intricate shading, and cluttered text. RushOrderTees recommends eliminating extra words, dates, phone numbers, and unnecessary details so the core mark stands out. NW Custom Apparel advises avoiding text below about a quarter inch tall, since smaller letters tend to blur together. MaggieFrame offers specific guidelines for on-demand embroidery, suggesting minimum line thickness around five hundredths of an inch, uppercase letters at least about three tenths of an inch high, and lowercase letters around a quarter inch high for dependable legibility.
Color choice also matters. Bigt Printing and HoopTalent suggest limiting designs to one to three colors when possible for budget control. MaggieFrame notes that most POD embroidery designs stay within about six thread colors from a limited palette to keep setups efficient and avoid excessive thread changes. C&A Embroidery recommends strong contrast between thread and fabric so logos remain readable from a distance.
For 3D puff, MaggieFrame reports that structured caps with bold, centered logos and elements at least around three tenths of an inch wide perform best, and keeping the design to one or two thread colors simplifies production while preserving the effect.
Finally, send clean files. MaggieFrame and MaggieFrames’ online ordering guide both recommend vector formats or high-resolution artwork at about 300 dpi, in sizes such as 1,200 by 720 pixels for caps and around 1,200 by 1,200 pixels for apparel embroidery, with transparent backgrounds and separated color layers. This gives your digitizer maximum control and reduces guesswork about edges and overlaps.
Choosing fabrics and backing that support your brand
The garment you pick can either set embroidery up to succeed or force the vendor to fight physics.
C&A Embroidery highlights cotton and cotton blends as ideal for embroidered t-shirts because they offer a smooth, stable surface and hold stitches securely. Heavier fabrics such as denim and canvas work well for jackets, bags, and workwear where durability and structure are important. Gelato and MaggieFrame both emphasize medium-to-heavyweight fabrics—such as heavyweight t-shirts, polo shirts, hoodies, hats, and tote bags—as the best candidates for embroidery because they support the thread and backing without warping.
Performance and polyester fabrics are common in sportswear and modern corporate apparel. CNA Embroidery notes that these materials can be excellent when using the right stabilizer and hooping technique, but they may pucker if mishandled. The Embroider recommends testing stabilizer combinations in advance, particularly for appliqués and patches, to ensure that the adhesive or cut-away backing does not distort the fabric.
NW Custom Apparel and StitchDigitizer caution against heavily stretchy or highly textured fabrics for fine-detail embroidery, since stitches can sink into deep textures or shift as the garment moves. When you do need to use challenging fabrics, experienced providers adjust stabilizer type, stitch density, and hooping pressure to compensate.
In practice, that means you should align fabric choice with use case. For daily uniforms, cotton or cotton-poly polos with a stable knit are hard to beat. For high-abuse workwear or bags, think in terms of canvas, duck cloth, or heavy twill. For athletic and performance wear, partner closely with your provider on stabilizer and stitch strategies.
Placement, sizing, and typography
Good placement and sizing ensure that your brand mark looks intentional rather than awkward.
NW Custom Apparel notes that for professional workwear, a standard left-chest logo width of roughly three and a half to four and a half inches typically preserves clarity and readability without dominating the garment. Logos larger than that may suit back placements or statement pieces but can feel heavy or out of place on everyday polos.
Logo placement also sets tone. NW Custom Apparel explains that left-chest placement reads as classic and professional, while sleeve placement gives a more modern accent and back placement supports large, bold messages. RushOrderTees and Pro-Celebrity add that the chest, sleeves, and the upper back area between the shoulder blades are common and effective locations.
RushOrderTees argues that smaller designs generally look more polished than oversized ones, especially on lighter garments. Large embroidered areas can work on jackets and sports jerseys but risk feeling stiff or heavy on thin shirts. State Graphics echoes this, suggesting that appliqué and large-scale embroidery be reserved for outerwear and teamwear where the garment can support the extra structure.
Typography is often the first point of failure. Elite Shirt Co., CNA Embroidery, and The Embroider all recommend clean, sans-serif fonts such as Arial or Helvetica for most logos, while warning that ornate scripts and extremely thin strokes tend to lose clarity when stitched. RushOrderTees notes that uppercase lettering can increase readability, especially in small logos, provided the overall letter height respects the quarter-inch guideline.
Embroidery Versus Other Decoration Methods
As a founder, you have several ways to decorate apparel and accessories. Embroidery is often the most premium, but it is not always the best fit for every design or price point. Several sources, including Bigt Printing, TeemiPrint, Gelato, MaggieFrame, HoopTalent, and State Graphics, compare embroidery with screen printing and direct-to-garment printing.
Method | How it works | Where it shines | Key limitations | Typical cost pattern from industry guides |
|---|---|---|---|---|
Embroidery | Machines stitch thread directly into the fabric using a digitized stitch file. | Corporate uniforms, polos, hats, hoodies, bags, towels, and premium merch that must survive heavy wear and washing. | Limited ability to reproduce gradients or photo-real images; higher per-unit cost, especially at low volumes; design complexity and color count increase price and run time. | Bigt Printing notes caps around $5.00 to $10.00 and shirts around $20.00 to $30.00; Extreme Screen Prints and HoopTalent cite roughly $0.50 to $3.00 per 1,000 stitches plus digitizing fees of about $15.00 to $50.00. |
Screen printing | Ink is pushed through stencils (screens) onto the garment surface. | Large, colorful or highly detailed graphics on t-shirts and hoodies; budget-sensitive, high-volume events and campaigns. | Printed ink can crack or fade over time, especially with heavy washing; does not have the same textured, high-end feel as embroidery; setup per color can be significant for small runs. | TeemiPrint and MaggieFrame both emphasize that screen printing usually has lower per-unit costs on large runs but incurs setup per color, making it less efficient for very small quantities. |
Direct-to-garment and hybrid | DTG jets ink directly onto fabric; hybrid approaches combine DTG prints with targeted embroidered accents. | Photo-real or highly detailed artwork, complex gradients, and small-batch fashion or art pieces; hybrid methods add tactical embroidery highlights to printed designs. | DTG prints generally do not match embroidery for durability or perceived luxury; hybrid techniques add cost and require coordination between printing and embroidery steps. | Gelato notes that DTG and screen printing typically undercut embroidery on cost for simple, high-volume jobs, while State Graphics describes hybrid DTG-plus-embroidery as a premium choice used selectively on complex designs. |
This comparison is not about picking a winner but about matching method to strategy. Embroidery is the right answer when you want a long-lived, premium-feeling logo on garments that represent your brand or your clients’ brands in person. Screen printing and DTG are better for large graphics, detailed art, or budget-driven campaigns. Many successful brands combine them—for example, embroidered logos on polos and jackets paired with printed t-shirts for events.
Strategic Playbook: Using Embroidery in a POD or Hybrid Model
When I work with founders building on-demand or hybrid brands, I encourage them to think of embroidery as a strategic pillar rather than a random add-on. The research from MaggieFrame, Gelato, Hooptalent, and the various vendor guides suggests a few practical patterns.
Treat embroidered products as premium anchors in your catalog. Because embroidery commands higher prices and delivers a more durable impression, it is ideal for tiered offerings: standard printed t-shirts at one price point, embroidered hats and polos at a higher tier, and complex multi-location embroidered hoodies or jackets as your top-shelf items. MaggieFrame’s margin guidance of targeting around $10.00 to $20.00 profit per embroidered shirt and over about $22.00 for complex pieces aligns well with this approach.
Use POD embroidery to test niches and then graduate winners. On-demand providers like Printful, Printify, and Gelato let you experiment with micro-niches—such as pet memorials, esports teams, or local specialty themes—without risking inventory. Once a design consistently sells, you can negotiate better rates with a traditional shop for bulk runs or keep it on POD if the economics still work.
Lean on behind-the-scenes content to differentiate. MaggieFrame notes that profitable embroidery brands often create social content showing hooping, stitching, and finishing. That transparency reinforces perceived quality and justifies premium pricing. It also educates your audience on why an embroidered logo costs more than a basic print.
Operationally, keep your artwork library “digitization ready.” Follow the file and sizing guidelines from MaggieFrame, MaggieFrames, and OddInfotech so that every new design can be quickly digitized and sampled. Standardize on a small set of placements and sizes—such as left-chest logos and front cap placements—so your catalog remains consistent, and your vendors can build efficient machine setups.
Finally, be disciplined about cost drivers. Track stitch counts, color counts, and digitizing fees for each design. When you see a logo creeping up into very high stitch territory, ask your digitizer if simplifying fills, reducing sizes, or trimming colors can maintain the look while lowering cost. This is exactly how experienced shops like StitchMine and Extreme Screen Prints balance design quality with throughput.
Short FAQ
Do I need large minimums to get quality embroidery?
Not necessarily. Traditional shops vary widely. HoopTalent mentions that many local providers set minimums around a couple dozen pieces per design, while Pro-Celebrity highlights that some vendors are willing to decorate as few as twelve pieces for an initial order and six pieces for repeat orders of the same design. Family-owned shops like Royal Stitch & Print emphasize flexible order sizes and even no minimums in some cases. On-demand platforms such as Printful, Printify, and Gelato effectively have no minimums at all; you can sell one embroidered piece at a time, although your per-unit cost will be higher than on bulk local orders.
How many thread colors and stitches should I aim for in a logo?
From a quality and cost perspective, industry guides consistently recommend keeping embroidery simple. HoopTalent and Bigt Printing suggest using one to three colors whenever possible to limit setup complexity and thread changes. MaggieFrame notes that most POD providers cap designs at about six thread colors. Extreme Screen Prints points out that typical corporate logos land in the 6,000 to 8,000 stitch range, while Hooptalent and MaggieFrame comment that designs around 15,000 stitches for a four inch by four inch area are a common practical ceiling before extra fees apply. In practical terms, a compact, bold logo with moderate stitch count and limited colors will be easier to digitize, more budget-friendly, and more consistent across garments.
What margins are realistic for embroidered products in an online store?
MaggieFrame’s research into profitable POD embroidery businesses suggests aiming for margins between roughly 15 and 50 percent, with many successful brands targeting about $10.00 to $20.00 profit per embroidered shirt and more than about $22.00 per item for complex, multi-location designs. To achieve that, you need to build your pricing around more than just the base POD or wholesale cost. Include digitizing fees, sample orders, platform commissions, and the occasional rush or remake. It is better to position embroidered products as premium and keep your margins healthy than to underprice and discover that you are effectively subsidizing every sale.
Closing Thoughts
Quality custom embroidery is one of the few ways a digital-first brand can add real-world weight to its story. When your customer picks up a cap or hoodie and feels dense, clean stitching instead of a flimsy print, they are holding a promise that your brand will still be around after dozens of wears and washes. If you combine the technical discipline outlined by providers like HoopTalent, MaggieFrame, OddInfotech, and The Embroider with a clear margin strategy, embroidery becomes more than decoration; it becomes a durable asset in your business model.

References
- https://nwcustomapparel.net/choosing-right-embroidery-design-tips/
- https://accent-embroidery.com/embroidery-that-speaks-volumes-heres-how-to-pick-the-right-partner/
- https://bigtprinting.com/the-ultimate-guide-for-custom-embroidery-prices-tips-and-more/
- https://creativegiant.ca/tips-for-choosing-the-right-embroidery-services-for-your-business/
- https://eliteshirtco.com/the-ultimate-guide-to-choosing-embroidery-services-for-your-business-needs/
- https://www.extremescreenprints.com/post/professional-embroidery-what-to-look-for-in-a-provider
- https://www.gelato.com/blog/custom-embroidery-a-creators-guide-to-profit
- https://www.polishedimagewear.com/the-ultimate-guide-to-finding-the-best-shirt-embroidery-services/
- https://royalstitchandprint.com/nj-corporate-embroidery-branded-custom-apparel/
- https://www.stategraphics.com/corporate-embroidery-methods-guide-choosing-the-right-approach-for-your-apparel/